Celebrate Groundhog's Day with your kids this February 2nd! This mask will help them understand why we watch our favorite groundhog on this day and will give them a fun, imaginary play experience! It's easy, cheap, and will take you little time to put together. Let's get started...and happy Groundhog’s Day!
Supplies:
Construction Paper (White, Brown and Black)
Scissors
Tape
Yarn or Jumbo Popsicle Stick
Directions:
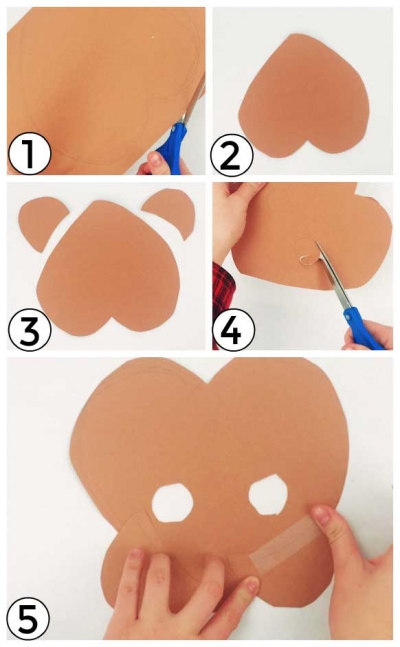
Cut a heart out of brown construction paper; this will be the head of the mask, so size accordingly. With the scraps of the brown paper, cut out the ears of the groundhog. To see, draw and cut two holes in the mask for the eyes (tip: slightly bend the paper where the holes are drawn and cut a slit in the center, then complete cutting out the eye circles). Next, secure the ears with tape on the back of the mask.

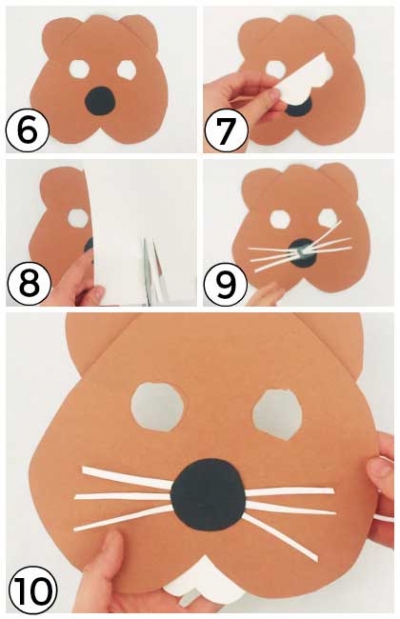
Using black construction paper, cut out your nose! Then, cut the whiskers out of white construction paper. With the scraps, cut out the teeth. Tape the whiskers to the back of the nose and secure the nose on the mask with double sided tape. Tape the teeth on to the back of the mask as well.

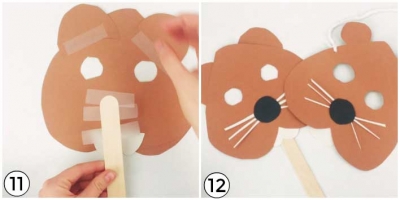
Your mask is almost done! There are two simple ways you can take this to the next level, 1. use yarn to make a hands free groundhog face, or 2. use a jumbo popsicle stick to make a stick mask. For the yarn, measure to back half of your child's head, then measure where the eyes are on the mask so they can see. Use a hole puncher or scissors to clip two holes to attach the yarn to, double knot each side. With the jumbo stick, tape the top of the popsicle stick to the back of the mask, secure it tightly with enough tape to hold up the mask.

Watch the video for more clarity here!